Tuesday, February 28, 2017

Budget Friendly Ways to Update Tech Skills in Atl and Beyond

I recently joined the Web Dev Office Hours meetup at the Rustic Couch in Duluth. In January Paul and Eugene did an excellent job demostrating how to implement a simple Angular 2 application. In two hours, Paul developed an app from scratch without downloading a git repo. Eugene provided background information while Eugene coded the app.

Currently, the meet up is twice a month with a beginner session alternating with an advanced meeting. At the leaders' request, I am sharing learning resources I use.

Books and Websites

  • JavaScript Absolute Beginner's Guide by Kirupa Chinnathambi

    This book is a great introdution to JavaScript. It is written in an easy to understand, casual style. Plus it is available from the Gwinnett library.

  • kirupa.com

    I also like his blog. I referenced the article Handling Events for Many Elements when working on a DOM manipulation project.

  • Eloquent JavaScript by Marijn Haverbeke

    This textbook describes javascript in depth covering advanced topics including modules, DOM, HTTP requests and responses. Working through the exercises gave me a solid JS foundation. I felt some of the sections needed additional information. I consulted other resources when the book was unclear.

Conferences

  • Atlanta Code Camp

    This confererence focuses on Microsoft technologies. However with Angular building on TypeScript and the use of VSCode for a variety projects, the line between platforms is blurring. At $10 including lunch, the conference is a bargin.

    There were beginner and intermediate sessions, including professional development disscussion applicable to all. I found Jeremy Likness's Angular sessions and "Getting to the next level - from Junior Developer to Architect or Director " by John Mann useful.

    This conference was held on a Saturday in October at the old Southern Poly campus of KSU.

    Connect.Tech

    This 3 day high-energy workshops and conference covered current trends in mobile development, front-end web design, Angular, React, PHP, and more. My favorite sessions were "Getting More Out of Git" by Jordan Kasper, "Engaging Engineering Teams in Design" by Josh Teague and Stephanie Brubaker, and "You Too Can Build a Bot: Programming Bots in Node.JS For Beginners" by Anthony Jesmok.

    I was lucky to be awarded a Women Who Code scholarship to attend this event. As a bonus, there was great swag. It was held Thursday-Saturday in October at the Cobb Galleria.

PluralSight Courses

One of the perks of the Atlanta Code Camp was a one month trial subscription to PluralSight. During the trial, I completed Scott Allen's AngularJS: Get Started course.

Since I enjoyed this course, I purchased a yearly membership. The currated courses are kept current and take you step-by-step through a topic. Repetition reinforces key points.

All the classes I have seen are excellent. These include the following:

Friday, January 16, 2015

Getting an Indian PAN card for a Georgia S-Corporation

Our S-corporation is doing business for an Indian company. To get paid, we need an Indian Permanent Account Number (PAN) number. We just received our number.

Since this process was confusing, I wanted to help others by documenting the steps I followed. I tried to be as accurate as possible in the instructions but did not repeat the process, since I did not want to apply for a second card. Let me know if you find this article helpful.

Cost

It cost our business about $35 to apply for a PAN card ($10 for Certified Articles of Incorporation, $5 for apostille of Articles of Incorporation and postage, $16 for PAN card fee, $4 for postage of documents to India).

One of the parts of the process that confused me was the websites for multiple offices of the Consulate General of India lists steps for getting a PAN card and fees of $60 if applying in person or $80 if applying by mail. I followed the process below instead.

Time

It took me about a month to complete the process. I used regular postage to get documents apostilled and to mail documents to India. I started the process in mid-December and we received the number in mid-January by email. We are still waiting for the physical card. The holidays might have affected the processing time in India.

Reference Links

India Income Tax Department PAN information

PDF version of for 49AA:Application for Permanent Account Number

Instructions for form 49AA: Application for Permanent Account Number

Documents required for PAN card

PAN application status tracking

Directions
  1. Get a certified copy of your Certificate of Incorporation from Georgia Secretary of State
    • Log on to your Georgia Secretary of State Corporations Division account (i.e., cGov360 account) at cgov.sos.state.ga.us
    • Under the Business Fillings tab from the Misc. column, select Web Certified Copies from the Document Order option. A page is displayed stating "a certificate attached to a copy of a document or electronic transmission filed by the Secretary of State, bearing his or her signature and the printed or embossed seal of this state, or its electronic equivalent, is prima-facie evidence that the original document has been filed with the Secretary of State". This means that the copy you pay for and download from this site is a certified copy. I printed a copy of this page to be sent in to be apostilled with the certified Articles of Incorporation. Click on the Next button to be taken to the Filer page.
    • From the Filer page, click Organization and enter Company Name and fill in the Complete Mailing Address section. Click the Add Filer button.
    • From the Select Documents page, enter part of your business name in the Inquiry box, select Entity Name as Search Type and click on Contains for Search Depth. Click on the Search button.
    • From the Search Results, select the Articles of Incorporation Document Type. Nothing will change on the screen. Click the Next button.
    • On the Validation page, you should see your business as the Filer and Articles of Incorporation as the Select Copies. Click the Next button.
    • The Payment page is displayed showing the amount due is $10, select Credit Card as the Payment Type and click the Next button.
    • Update credit card information on the Payment page.
    • Then you receive your copies as an electronic document with a cover sheet from the secretary of state stating "that the attached documents are true and correct copies of documents maintained by the Corporations Division of the Office of the Secretary of State of Georgia".
  2. Get the certified copy of the Articles of Incorporation apostilled.
    • In Georgia, the Georgia Superior Court Clerks' Cooperative Authority can apostille the documents for India since India is a participant of the Hague Treaty Convention 12. Even though the webpage General Apostille Information states that Corporate documents on file with the Georgia Secretary of State Corporations Division must be certified copies issued directly from the Corporations Division office and that apostilles are not issued on downloaded documents from the internet. The downloaded certified copies I paid for were apostilled.
    • Download, print out, and fill in the Georgia Superior Court Clerks’ Cooperative Authority Apostille Request Form.
    • Mail the completed form, the documents, payment ($3), and a self-addressed stamped envelope for document return.
  3. Fill out on-line PAN card application.
    • For a foreign business, you will need to fill out Form 49AA, Online Application for New PAN (Form 49AA). For an S-corporation, I selected Firm in the Apply for New PAN Card box and clicked the Select button.
    • Fill in the Application for Allotment of Permanent Account Number.
    • International Taxation AO details: I am unsure about the appropriate way to fill out the way to fill in the Area Code, AO Type, Range Code, and AO Number. Rereading the instructions, I would select the default DLC-C-35-1 code mentioned in the instructions paragraphs. I selected a different code on our application.
    • Question 5 Date of Incorporation: Enter day first and then month and year
    • Question 7 Address: I entered our business name for both the Name of Office and Name of Premises/Building/Village.
    • Question 9 Telephone No.: Do not use spaces in phone number.
    • Question 10 Status of Applicant: For an S-corporation, I selected firm.
    • Question 15 Documents enclosed: I used "Copy of certificate of Registration issued in the country where the applicant is located, duly attested by 'Apostitle' or by the Indian embassy/High Commission/Consulate in the country where the applicant is located or authorized officials of overseas branches of Scheduled Banks registered in India" for both proof of identity and proof of address.
    • Question 17(g) Taxpayer Identification Number in the country of residence: For place, enter United States
    • Payment Details:I selected Credit Card. My attempts to charge the 971 rupee fee, about $16, to our business VISA failed using the Citibank / BillDesk Payment gateway failed. I was able to use the transaction number provided to charge the fee to a personal VISA.
    • Once your payment is accepted, you get an Acknowledgement for request for new PAN card (Form 49AA) pdf that contains your Acknowledgement Number.
  4. Mail forms to India
    • Mail Apostilled copy of your Articles of Incorporation and a copy of the Acknowledgement for request for new PAN card to the address noted in the acknowledgement pdf. It cost us about $4 to send the documents to India by first class mail.
    • Use the acknowledgement number to track track the status of your PAN card request, Pan Status Track.The status changes from waiting for papers to under review to dispatched. I also received emails stating the status
    • You need to sign for the PAN card when it arrives.

Wednesday, July 30, 2014

Pinckneyville Garden Iced Mint Tea

Plenty of mint is growing in the Pinckneyville Middle School garden. Teachers enjoyed this refreshing drink at a spring garden breakfast. Stop by on Open House day this Thursday for a sample. The following recipe makes 1/2 gallon of tea.

Sugar

I like the tea made with 1/3 cup of sugar. Some of the students preferred a sweeter version made with 1/2 cup of sugar. If you plan to serve it over lots of ice, use more sugar.

Ingredients
1/3 - 1/2CupsSugar
2/3CupsFresh mint leaves, lightly packed
2CupsBoiling Water
6CupsCool Water
Directions
  1. Rinse mint leaves in cool water to remove dirt. Remove leaves from stems, and lightly pack leaves in the measuring cup.
  2. Dissolve sugar in boiling water. Add mint leaves and seep for 15-20 minutes.
  3. Strain leaves and add cool water to make 1/2 gallon.
  4. Refrigerate until cool. If desired, serve over ice.

Monday, April 7, 2014

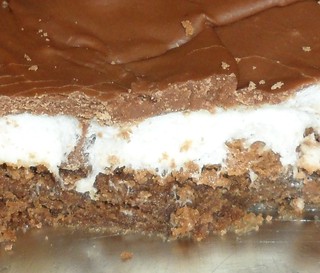
Heavenly Hash Cake

Heavenly hash topHeavenly hash side

When I was growing up this was one of my favorite desserts. The candy like marshmallow chocolate topping helps the cake stay fresh. As part of its College Care service, my mom's business, Nancy's Corner, used to deliver this cake to local college students. I made this cake for my daughter's birthday this year. To test that it ships well, I sent one to my nephew for his 7th birthday.

My mom uses the "Heavenly Hash Cake" recipe from The Cotton Country Collection cookbook by the Junior League of Monroe, LA. I started with the NOPSI recipe from the cookbook From Woodstoves to Microwaves Cooking with Entergy. After consulting with my mom, I came up with my version for an 8"x8" cake based on these recipes. I substituted flour and baking powder for self-rising flour, heated the milk and butter before adding it to the powdered sugar and cocoa, and used large marshmallows.

Recipe Name

The recipe reminds me of the chocolate marshmallow Elmer's Heavenly Hash eggs I received in my Easter basket every year when I was young.

Helpful Hints

For the chocolate topping, heat the butter with the evaporated milk before adding to powdered sugar and cocoa. This results in a pourable frosting. Mixing cold or room temperature milk with the butter can cause the butter to re-solidify resulting in a lumpy topping.

Cut your marshmallows in advance, so they slightly melt when put on on cake.

Ingredients
1/2CupButter, one stick
1CupSugar
2Eggs
1TspVanilla
3/4CupWhite flour
1/8CupCocoa powder
3/4TspBaking powder
21-24Large marshmallows, about 1/2 a 10 ounce bag
2CupsPowdered sugar
1/8CupCocoa powder
1/8CupButter, 2 Tbsps
1/4CupEvaporated Milk
Directions
  1. Grease and flour an 8" x 8" baking pan.
  2. Preheat oven to 350 degrees.
  3. Sift together flour, 1/8 cup cocoa powder, and baking powder.
  4. Using an electric mixer, cream together butter and sugar. Beat until light and fluffy.
  5. Add eggs, one at a time, and mix until smooth.
  6. Add vanilla and mix.
  7. Slowly add sifted ingredients and mix.
  8. Pour the thick batter into the prepared pan.
  9. Bake 30 to 35 minutes.
  10. While baking, cut marshmallows in half using kitchen scissors.
  11. Immediately after removing the cake from the oven, put cut marshmallows on top of cake in a single layer, cut side down.
  12. For topping, sift together powder sugar and 1/8 cup cocoa powder.
  13. Heat butter and evaporated milk until butter is melted. I do this in a cup in the microwave.
  14. Using an electric mixer, mix butter and milk into sugar and cocoa until smooth.
  15. Pour topping on top of marshmallows.
  16. Allow to sit overnight or until topping is hard.
' >

Tuesday, February 18, 2014

Oatmeal Wheat Chocolate Chip Cookies

Chocolate Chip Cookies

This is the chocolate chip cookie recipe I use. It is based on the "Everybody-Loves-Chocolate-Chip Cookies" recipe in the Better Homes and Gardens Cookies for Kids cookbook. I added instant oats to the recipe and replaced part of the white flour with wheat flour. I think the wheat flour and oats give the cookies a nutty flavor even if there are no nuts in the cookies. I always use butter when I make these cookies.

For variety, use a different type of baking chip or a combination of chips. On Saturday, I made a regular batch for my daughter to share with her winter guard team. I used semi-sweet chocolate chips, chopped up Wilton Candy Cane Colorburst Melts, and Holiday Mint M&M's. in the batch I sent to my son who is taking the first part of the CPA exam on Friday,

This recipe make about 4 dozen 2" cookies or 3 dozen 3" cookies. Note the different bake times in the recipe.

Brown Sugar

Brown sugar should be firmly packed in the cup when measuring it.

Pinch

A pinch is just a little bit or about 1/8 a teaspoon

Ingredients
1/2CupButter, 1 stick
1/2CupVegetable shortening
1CupBrown sugar
1/2CupSugar
2Eggs
1 1/2TspsVanilla
1TspBaking soda
PinchSalt
1/2CupInstant oats
1CupWheat flour
1 1/2CupsWhite flour
1CupChocolate chips
1/2CupNuts, chopped, or extra chocolate chips
Directions
  1. Preheat oven to 375 degrees.
  2. Using an electric mixer, cream together butter, shortening, brown sugar, and sugar. Beat until light and fluffy.
  3. Add eggs and vanilla. Beat until blended.
  4. Add pinch of salt, baking soda, and oats to creamed mixture. Mix well.
  5. Mix in wheat flour.
  6. Mix in white flour.
  7. Batter is stiff. Stir in chocolate chips and nuts by hand.
    Cookie Batter
  8. For 2" cookies, rolls balls about 1 1/4" in diameter and place on baking sheets. For 3" cookies, roll balls about 1 1/2" in diameter. I bake 12 cookies on a AirBake cookie sheet.
    Cookies on Trap
  9. Bake 2" cookies about 10-12 minutes and 3" cookies, 12-14 minutes.
  10. Immediately remove from pan.
    Baked 2" Cookies

Saturday, February 8, 2014

Cinnamon Nut Coffee Cake

Cinnamon Nut Coffee Cake

When I was growing up, my mom occasionally made Bisquick Streusel Coffee Cake for a breakfast treat. Since I usually do not have Bisquick, I was happy to find a similar Coffee Cake recipe in the February 2001 issue of Family Fun magazine.

I altered my version by using part wheat flour and adding an extra tablespoon of butter in the batter. In the topping, I reduced the cinnamon and added nutmeg. I also increased the baking time since my cake takes 40 to 45 minutes to bake versus the 25 to 30 in the original recipe.

Ingredients
1 1/3 CupsWhite flour
2/3 CupWheat flour
1 TspBaking powder
1/2 TspBaking soda
1/2 TspSalt
3/4 CupSugar
2 TbspsMelted butter
1 Egg, room temperature
1 1/2 CupsButtermilk
Topping
1/3 CupBrown sugar
1/2 CupChopped nuts (pecans or walnuts)
1 TspGround cinnamon
1/4 TspGround nutmeg
Directions
  1. Preheat oven to 375 degrees. Grease and flour a 9-inch cake pan.
  2. In a medium-sized bowl, mix brown sugar, chopped nuts, cinnamon, and nutmeg. Set aside.
  3. In a large bowl, mix white flour, wheat flour, baking powder, baking soda, salt, and sugar.
  4. In a medium-sized bowl, mix melted butter, egg, and buttermilk.
  5. Add the buttermilk mixture to the dry ingredients and stir to mix. Pour the batter into the cake pan.
  6. Sprinkle topping evenly over batter. Press topping gently into batter so that it is moist. If the topping is too dry, it crumbles off the cake. If desired, run a knife through the batter and topping to get a swirl effect.
  7. Bake for 40 to 45 minutes or until a toothpick inserted into cake comes out clean.

Monday, January 27, 2014

Indian Tofu with Cream Sauce

Tofu in Indian cream sauce

My vegetarian daughter came home from college this past weekend. I used the other half of a batch of Indian Cream Sauce with Garlic, Ginger, and Tomatoes that I had stored in the freezer to prepare this dish.

The dish is a variation of my standard Indian company entree, chicken with cream sauce. The tofu version has an extra 1/4 teaspoon black pepper added to the sauce. My husband, daughter, and I enjoyed the meal. I am looking forward to trying the sauce with paneer and boiled eggs.

Ingredients
1 LbFirm tofu, cut into 1" cubes, about 32 cubes
1 TspSalt for marinade
2 TspsGround cumin
1 TspGround coriander
1/2 TspGround turmeric
1/2 TspGround red or cayenne pepper
2 TbspsVegetable oil for marinade
3-5 TbspsVegetable oil, for browning tofu, as needed
4 cupsIndian cream sauce with garlic, ginger, and tomatoes
1/2 CupWater
1/2 Cupheavy cream
1 TspSalt for sauce
2 TspsGaram masala
1/4 TspGround black pepper
3-6 PodsCardamon, lightly crushed, optional
Directions
  1. Put tofu pieces in a flat container with a lid. Mix 1 teaspoon salt, cumin, coriander, turmeric, and cayenne in small bowl. Sprinkle spices on top of tofu. Add 2 tablespoons vegetable oil, cover, and shake to mix. Put in fridge, and marinate overnight or for at least one hour.
    Marinating tofu
  2. In a large pot, heat 3 tablespoons oil on medium high. Add as many tofu pieces as will fit in a single layer. Turn to brown on all sides. Remove browned pieces. Continue until all tofu is browned. Add more oil as needed.
  3. Add water and Indian cream sauce to pot. Bring to a simmer. Add tofu, and simmer 10 minutes.
  4. Add cream, 1 teaspoon of salt, black pepper, garam masala, and cardamon pods, if desired. Simmer for about 10 minutes until sauce is slightly thick and creamy. Stir often.
  5. Adjust seasonings to taste before serving. Serve over rice.

Thursday, January 23, 2014

Indian Chicken with Cream Sauce

Printer friendly page

One of my standard Indian company dishes is chicken with cream sauce. Since my kids are vegetarian, I developed a cream sauce recipe that can be used for both a chicken dish and a vegetarian dish. This recipe uses the cream sauce described in my previous post Indian Cream Sauce with Garlic, Ginger, and Tomatoes.

Chicken

I usually buy chicken leg quarters in a 10 pound bag. The quarters are tasty and a good value. I use the chicken skin for stock and cut thighs into 2 pieces.

My husband and I were joking that there are 10 leg/thigh pieces in a 10 pound bag. This is about right. The last time we bought chicken, there were 11 leg quarters in the 10 pound bag.

Chicken stock

It is easy to make chicken stock. Cover chicken skin and bones with water. Add onions, and bring to a boil. Turn heat to low and simmer. When stock is done, stain off liquid and refrigerate. The fat will rise to the top and can be removed the next day.

I think stock tastes better if you simmer it for a long time, 2 or more hours. My husband prefers to simmer his only 1 hour. When I made stock for this dish, I added garlic and ginger to the stock to repeat the garlic and ginger flavors of the tomato sauce.

Ingredients
3 LbsChicken, about 3-4 leg quarters, skinned and cut in pieces
1 TspSalt
2 TspsCumin
1 TspCoriander
1/2 TspTurmeric
1/2 TspGround red or cayenne pepper
4-6 TbspsVegetable oil
4 CupsIndian cream sauce with garlic, ginger, and tomatoes
1 CupChicken stock or water
1/2 CupHeavy cream
1 TspSalt
2 TspsGaram masala
3-6 PodsCardamon, lightly crushed, optional
Directions
  1. Skin chicken and cut into pieces. Put in bowl to marinate. Prick with a knife.
  2. Mix 1 teaspoon salt, cumin, coriander, turmeric, and cayenne in small bowl. Sprinkle spices on top of chicken. Put in fridge, and let marinate overnight or for at least one hour.
  3. In a large pot, heat oil on medium high. Add as many chicken pieces as fit in single layer and brown pieces on all sides, 30 seconds to 1 minute per side. Remove browned pieces. Continue until all pieces are browned. Add more oil as needed.
  4. Add 1 cup chicken stock and Indian cream sauce to pot. Bring to a simmer. Add chicken, and simmer 20-30 minutes until chicken is cooked.
  5. Remove chicken. Bring sauce to a boil and cook to thicken, about 10 minutes. Stir sauce often to prevent sticking.
  6. Add cream, 1 teaspoon of salt, garam masala, and cardamon pods, if desired. Simmer for about 10 minutes until sauce is slightly thick and creamy. Stir often. The dish can be prepared ahead up to this point.
  7. To serve, bring sauce to a simmer. Add chicken and heat until warm. Adjust seasonings to taste before serving. Serve over rice.

Saturday, January 18, 2014

Indian Cream Sauce with Garlic, Ginger, and Tomatoes

Printer friendly page

One of my standard company recipes for an Indian dinner is "Chicken with Cream" from the cookbook Madhur Jaffrey's Indian Cooking. My kids are vegetarian, so I also make a vegetarian side dish.

My husband suggested making the cream sauce separately, so I could use it for both a chicken dish and a vegetarian dish. Here is the adapted sauce recipe that I used for a company dinner the other night.

Ingredients
2 BulbsGarlic, about 24 cloves, peeled
4" PieceGinger, peeled and cut into thick slices
1 CupWater
3 TbspsVegetable oil
3 Onions, large, finely chopped, about 3-3 1/2 cups
4 TspsCumin
4 TspsCoriander
1 TspTurmeric
1 TspGround Red or cayenne pepper
1 28 oz. CanCrushed tomatoes
1 CupYogurt
2 CupsWater
1 TspSalt
Directions
  1. Blend garlic and ginger in 1 cup of water. For blending, I use an hand-held immersion blender.
  2. In a large pot, heat oil on medium high heat. Add onions, and cook until onions are golden and edges start to brown, about 5-10 minutes.
  3. Add garlic ginger liquid. Cook, stirring occasionally, until liquid evaporates about 10 minutes.
  4. Add spices and stir to mix
  5. Turn heat to medium low. Add crushed tomatoes and cook 5 minutes.
  6. Add yogurt 1/4 cup at a time. Stir until yogurt is incorporated before adding more yogurt.
  7. Add 2 cups water and bring to a simmer. Turn heat to low, cover and simmer 30 minutes.
  8. Turn off heat, and add salt.

Wednesday, January 15, 2014

Heating Food without a Microwave

Printer friendly page

Our microwave broke last week. My kids have returned to college from their holiday visit, and there are plenty of leftovers in our fridge. I have had to find different ways to heat them. Here are my favorites:

Pressure Cooker

I use my pressure cooker to heat rice, beans, macaroni, and chili. By using two straight-side pans and an extra steamer tray, I can heat the rice or macaroni in one pan and the beans or chili in another. If you just have a little, you can heat rice and beans in the pan. The advantage of this method is that the food stays warm in the cooker.

Directions
  1. Put water in the bottom of cooker until it covers first steamer tray. Then put in the first pan with food.
  2. Next add another steamer tray and the second pan.
  3. Heat the pressure cooker on high until pressure is reached and weight rattles. Reduce heat slightly and cook for 5 minutes under pressure with weight slightly rattling.
  4. Food is ready to eat when pressure drops and pan can be opened.
Toaster Oven

I use a toaster oven to heat pizza slices and bowls of rice and beans. Pizza tastes crunchy and baked and not soggy and chewy like microwaved pizza.

Put pizza slices on a tray, and cover lightly with aluminum foil. Make sure the aluminum does not touch the pizza sauce since tomatoes can corrode aluminum. Heat at 350 degrees for 10-15 minutes depending on size of the slice.

To heat rice and beans, place rice and beans in a stoneware bowl and add a bit of water. Cover with foil, and bake about 10 minutes at 350 degrees.

Skillet

I use a skillet to heat rice and beans together. You can add extra onions and other vegetables to stretch the dish. The same method can be used for chili or pasta sauce and macaroni. Last week I prepared chili mac with sweet potatoes.

Directions
  1. Saute onions, garlic, and other vegetables in oil in skillet. If needed, cover and cook until vegetables are tender.
  2. Add rice and lightly cook until grains are separate.
  3. Add beans, seasonings and extra water. Stir to mix. Cover and heat until food is ready.
Thermos

I usually make a pot of coffee in the morning, and heat up cups during the day. Without a microwave, I use a thermos to keep coffee warm all day. For best results, preheat the thermos with hot water before adding the coffee.

Monday, January 13, 2014

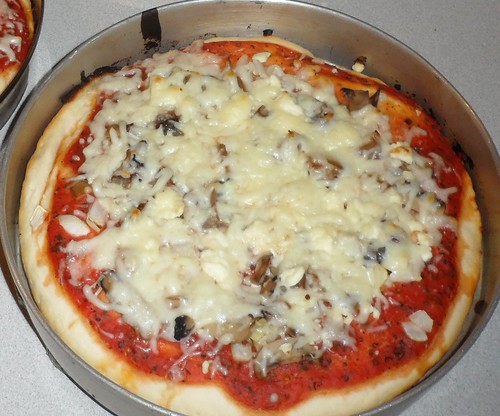
Pan Pizza, Pizza Hut Style

Pan Pizza, Pizza Hut Style

Before my daughter joined the high school band and Friday night football entered our life, fall Fridays were pizza night at our house. I have had good results with the recipe for Pizza Hut pan pizza that I found on-line. I use less oil than the original and add cayenne pepper to the dough.

Since this recipe makes 3 small pizza, it easy to customize the pizza toppings to your family's preferences. My husband and son like jalapeño slices on their pizza. Sometimes I add meat to one for my husband and me.

Two pizza are usually enough for my family of four. The extra pizza can be frozen. I just gave my daughter an extra pizza to back to college with her.

Pizza Sauce

I use jarred pizza sauce or make my own sauce. Use a thick sauce, so the top of the pizza does not get soggy. I like to use strained homemade tomato sauce that I make and freeze in the summer with tomatoes from our garden.

Ingredients
1 1/3CupsWarm water
1TbspDry yeast
1/4CupNon-fat powdered milk
1TbspSugar
4CupsWhite flour
1TspSalt
1/2TspCayenne pepper, optional
2TbspsOlive oil for dough
6TbspsOlive oil for pans
1CupPizza sauce, homemade or canned
Pizza toppings
1 1/2CupsMozzarella cheese, about 8 oz.
Directions
  1. In a small pitcher or pyrex measuring cup, mix lukewarm water, yeast, powdered milk, and sugar. Let sit 5-10 minutes until yeast starts working; liquid gets frothy as bubbles begin to form.
  2. While waiting, put flour, salt, and cayenne pepper in KitchenAid mixing bowl.
  3. Add 2 tablespoons olive oil to yeast liquid. Using flat beater at low speed, mix yeast liquid into flour mixture until just moist. Cover with a towel, and wait 5 minutes.
  4. Switch to dough hook, and knead for about 5 minutes. The dough is ready when it is soft and elastic. If dough is too stiff, add water 1 teaspoon at a time. If dough is too sticky, add flour 1 tablespoon at a time.
  5. Divide dough into 3 pieces.
  6. For each pizza, put 2 tablespoons olive oil in a 9 inch cake pan. Knead a piece of dough by hand about 10 times. Using a rolling pin, roll dough into a circle. The circle should be slightly larger than the cake pan since the dough contracts when put in the pan.
  7. Cover pizzas with a kitchen towel, and let rise for 1 to 1 1/2 hours.
  8. Preheat oven to 475 degrees.
  9. Spread about 1/3 cup sauce on each pizza, and put on toppings.
  10. Bake pizzas 10 minutes with just sauce and toppings.
  11. Sprinkle about 1/2 cup cheese on each pizza, and bake 7-10 more minutes. Pizza is ready when cheese is melted and bottom is golden brown.

Saturday, January 4, 2014

Veggie Cream Cheese Spread

I made this spread the other night when my husband's business partner and his family came for dinner. I experimented with cream cheese spreads when my husband's uncle visited from India. He is a vegetarian and asked me for some sandwiches for his plane trip. I like the vegetable cream cheese served at Bruegger's Bagels and Atlanta Bread Company and came up my own spicy version.

Other Cream Cheese Spreads

When I was growing up, we often had crackers served with a block of cream cheese topped with Pickapeppa sauce or topped with pepper jelly at parties. I still serve both of these easy, inexpensive appetizers.

Veggie Cream Cheese Spread

I vary the vegetables used in my spread based on what I have at home. My spread usually has carrots since they give the dish a wonderful golden color and hot peppers since my family likes spicy food. I have also added celery, radishes, zucchini, dried tomatoes, and/or garlic into my versions. Thanks to my husband for taking the following photo.

Ingredients
1 8 ounce packageCream cheese, at room temperature
1/2 Jalapeño, finely chopped
1/2 CupGrated carrot, about 1 medium
1 TbspFinely chopped onion
1 TbspFinely chopped celery
1/2 TspSalt
Directions
  1. Place cream cheese in mixer, and mix until smooth.
  2. Add remaining ingredients, and mix well. Stop and scrape sides and mixing blade occasionally to get a uniform spread.
  3. Serve with crackers and/or vegetables.

Jalepeño Cilantro Cream Cheese Spread

This is a spicy version. Add one pepper, and try it before adding the second pepper.

Ingredients
1 8 ounce packageCream cheese, at room temperature
2 Jalapeño, finely chopped
1/4 CupFinely chopped cilantro
1/2 TspSalt
Directions
  1. Place cream cheese in mixer, and mix until smooth.
  2. Add remaining ingredients, and mix well. Stop and scrape sides and mixing blade occasionally to get a uniform spread.
  3. Serve with crackers and/or vegetables.

Friday, November 15, 2013

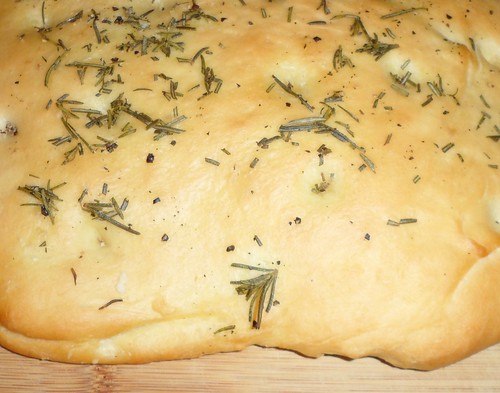
Rosemary Focaccia

Rosemay Focaccia

I try to avoid using the oven during the summer. Now that the weather has turned cool, it is a perfect time to bake focaccia.

Before my kids went away to college, we would enjoy this as an appetizer on home trivia evenings. We used the Brain Quest trivia decks when my son and daughter were young. The kids always liked it when they could answer a question based on something they learned in school. It was even better if they knew something their parents did not.

My kids liked to take focaccia sandwiches to school for lunch. I enjoy the bread reheated until crunchy and served with soup on cold day.

This recipe is based on the "Rosemary Focaccia" recipe in Betty Crocker's Bread Machine Cookbook (copyright 1995) that my sister gave me. I doubled the recipe quantities and modified the recipe to use a free-standing KithenAid mixer instead of a bread machine.

Rosemary

Since we have a hugh rosemary bush growing in the front of our house, I use fresh rosemary. Rosemary is easy to grow; just remember that rosemary likes dry soil. Our family still talks about the rosemary and lavender hedges we saw in Australia.

If you use dried rosemary, soak the rosemary in olive oil before spreading on top.

Variations

This recipe is easy to modify. I have used jalapeño slices, olives, Parmesan cheese, and cooked potato slices as toppings. I have also added crushed red pepper flakes and Indian 5 Spice mixture (i.e., equal parts of cumin seeds, black mustard seeds, fennel seeds, fenugreek seeds, and kalonji seeds) to the dough.

Yeast

I use bulk yeast, currently Fleischmann's Instant Dry Yeast, that I buy at Sam's.

Baking sheets

My baking sheets are seasoned and I do not grease them. If needed, grease baking sheets before placing loaves on them.

Olive oil

I find the easiest way to spread the olive oil on top of dough is with my fingers. You can use a pastry brush or slowly pour the oil from the bottle instead.

Ingredients
1 1/2CupsWarm water
1TbspYeast
pinchSugar, for yeast liquid
4CupsBread flour
2TbspSugar, for dough
1TbspSalt
4TbspOlive oil for dough
4TbspOlive oil for topping
4TbspRosemary, fresh preferred, chopped
Fresh ground black pepper, to taste
Kosher flake salt, optional
Directions
  1. In small pitcher or pyrex measuring cup, mix lukewarm water, yeast, and pinch sugar. Let sit 5-10 minutes until yeast starts working, liquid gets frothy as bubbles begin to form.
  2. While waiting, put bread flour, sugar, salt, and olive oil in KitchenAid mixing bowl.
  3. Using flat beater at low speed, mix yeast liquid into flour mixture until just moist. Cover with a towel, and wait 5 minutes.
  4. Switch to dough hook, and mix for about 5 minutes until dough is smooth and elastic and forms a ball. If dough is too sticky, add 1-2 tablespoon flour at a time, and continue mixing and adding flour until dough is correct consistency.
  5. Place dough in oiled bowl, and turn dough to coat with oil. Cover bowl with a towel, and let rise until double, about 1 hour.
  6. Divide dough into 2 pieces. Using a rolling pin, roll each piece into a rectangle, approximately 10" X 12". If needed, grease baking sheets. Place each dough rectangle on a baking sheet. Cover with towels, and let rise about 30 minutes.
  7. Preheat oven to 400 degrees.
  8. Using your finger, make indentations in dough about every 2". Top each loaf with olive oil, rosemary, and freshly ground black pepper. If desired, sprinkle kosher flake salt on top.
  9. Bake 15-18 minutes until golden brown.

Friday, October 18, 2013

Ridge Gourd Experiments/Standard Indian Vegetable Recipe

I volunteer at Pinckneyville Middle School's garden. When my husband visited India earlier this year, I asked him to bring home Indian vegetable seeds. I thought the students would enjoy learning about different vegetables.

We planted the vegetables in our home garden at the beginning of the summer. When school started in the fall, there were ridge gourd vines circling the fence around our garden.

I brought the first ripe ridge gourd to a garden club meeting to show the students. The kids and master gardeners, Mim Harris and Kelli Clay, advising the club wondered what the gourd tasted like. We tried it and thought it tasted like a cross between a zucchini and a cucumber with a slightly bitter skin.

At another meeting, we enjoyed peeled, raw slices and ridge gourd chutney. We talked about ideas for preparing the gourd. Anyone who wanted took a gourd home after agreeing to report how they ate it. Some ate it raw, some sauteed it with olive oil and garlic, and some used it in soup.

Cutting the Ridge Gourd

To prepare ridge gourd, I cut off the ridges using a paring knife. I peel young, tender gourds using a swivel vegetable peeler. I use a fixed blade peeler for older gourds with tougher skin.

My Experiments

Since this was a new vegetable for me, the first dish I made was Indian ridge gourd using my standard Indian vegetable recipe that I have included below. I also added chopped up pieces of gourd to my Indian lentils (umptee).

The ridge gourd dish my husband remembered eating while he was growing up in India was chutney made with ridge gourd peel and sesame seeds. From the blog Priya's Versatile Recipes, I made Ridgegourd Peels N Sesame Seeds Chutney. When we visited my son at UGA, I brought him some of this chutney and other homemade goodies. Recently when he was home visiting, he told me he particularly liked this dish. Next time I make this dish, I plan to remove the outer strings of the gourd which resemble celery strings.

Another dish my husband and I enjoyed was Ridge Gourd Chutney from the blog Rak's Kitchen. The middle school students tried this as a dip with pieces of pitas.

My daughter who attends Georgia State University liked the pasta dishes I made with ridge gourd, olive oil, garlic and a combination of the following: tomatoes, peppers, and/or cream. I also tried using the gourd in soups and as an omelet filling. The slightly bitter flavor of the gourd did now work well in the omelet.

I am currently drying some gourds for loofah. I plan to save the seeds, so students can grow them in the school garden next year.

Standard Indian Vegetable Recipe

I learned this recipe from my husband and in-laws. I use it to cook a variety of vegetables: potatoes, cauliflower, spinach, peas. I also use it for mix of vegetables (e.g., spinach and potatoes, potatoes and peas).

Ingredients
3-4 Ridge gourds, peeled and chopped into 1/2-3/4 inch pieces, about 4 cups
1 MediumOnion, chopped, about 1 cup
1-2 Jalapeño pepper, finely minced, to taste
2 TbspVegetable oil
1/4 TspMustard seeds, black preferred
PinchAsafoetida
1/8 TspTurmeric
1 CupTomatoes, chopped
1/8 TspCayenne pepper
1/4 TspBlack (Goda) masala
1/2 TspSalt
2 TbspCilantro leaves, chopped
Directions
  1. In a large pot, heat oil and mustard seeds on medium high heat. When mustard seeds pop, add onions. Cook until onions are translucent, about 3-5 minutes. Turn heat down if onions start to brown.
  2. Add turmeric and asafoetida and cook for 30 seconds.
  3. Add ridge gourd and jalapeño peppers. Stir to mix. Cover, turn heat to low, and cook 5 minutes.
  4. Add salt, cayenne, and black masala. Stir to mix. Cover and cook 5 more minutes.
  5. Using a fork, check to see if vegetables are ready. Vegetables are ready when they can be easily pricked with a fork but are still firm. If vegetables are not ready or for softer vegetables, cover and continue cooking for 5 more minutes.
  6. Continue checking and cooking until vegetables are done.
  7. Turn off heat, and top with cilantro before serving.
  8. This same recipe can be used for other vegetables including potatoes and cauliflower. Add 2 tablespoons of water for vegetables with low moisture content. If needed, add more water while cooking.

Sunday, July 28, 2013

Umptee/Umpti/Amti/Normal Dal/Maharashtrian Dal (Lentils)

I learned to cook this recipe from my Indian in-laws when they visited the United States. It is the type of dal, my husband's paternal grandparents ate for lunch and dinner most days. My husband ate it often when he was growing up.

Recipe Name

Since I learned to cook dal from my in-laws, I did not have a written recipe. I always assumed the dish name was umptee. When writing the recipe, my husband told me the name is amti. My daughter usually calls this normal dal to distinguish it from other Indian lentil dishes I serve. If she wrote the name, she would spell it umpti.

Toor Dal

Toor dal, also called pigeon peas, is a yellow lentil that is common in India. It is usually sold split without the outer hull. I buy mine at the Indian grocery. It comes in two varieties, plain and oily. I buy the plain. Unseasoned, cooked dal is easy to digest and makes a good baby food. When my kids were little, I put some of the dal aside for them when making this dish.

Black (Goda) Masala

Black (Goda) masala is a Maharashtrian spice mixture made of roasted and ground coconut, chilis, and other spices. Like many Indian families, I get mine from relatives (e.g., my mother-in-law and sister-in-law) in Indian. It is one of the things we always get when we visit India or ask for when relatives visit. Sometimes, Goda masala is available at Indian grocery stores.

Ingredients
3/4 CupToor dal, plain preferred
5 CupsWater, total
1 LargeOnion, cut in half and then crescents, about 2 cups
1 Jalapeno pepper, finely minced
2 TbspVegetable oil
1/2 TspMustard seeds, black preferred
1/8 TspAsafoetida
1/4 TspTurmeric
1 CupTomatoes, chopped
1/4 TspCayenne pepper
1/2 TspBlack (Goda) masala
1 1/2 TspSalt
1/4 CupDried coconut, unsweetened
2 TbspCilantro leaves, chopped
Fresh lemon juice, optional
Directions
  1. Rinse dal, add 3 cups of water and cook until soft. In a pressure cooker, cook for 5 minutes after reaching pressure.
  2. In a large pot, heat oil and mustard seeds on medium high heat. When mustard seeds pop, add onions. Cook until onions are translucent, about 3-5 minutes. Turn heat down if onions start to brown.
  3. Add turmeric and asafoetida and cook for 30 seconds.
  4. Add toor dal, 2 cups of water, tomatoes, jalapeno, cayenne pepper, black masala, salt, and coconut. Increase heat and bring to a boil. Reduce heat and simmer 10 minutes. Adjust seasonings to taste.
  5. Turn off heat, and add cilantro before serving. If desired, add fresh lemon juice to the entire pot or on top of individual servings.

Friday, June 21, 2013

Father's Day Monkey Bread and Uppama/Savory Cream of Wheat

This past Sunday was my husband's birthday as well as Father's Day. To celebrate my son and I made him a special brunch. My son baked monkey bread, and I cooked uppama, savory Indian cream of wheat.

Monkey Bread

My son likes to make monkey bread from scratch for special occasions (e.g., Mother's Day, Father's Day, Christmas). He uses the recipe in the article "Let's Make Monkey Bread" from the December/January 2005 edition of Family Fun magazine. You can find it here Let's Make Monkey Bread. Since it is time consuming to make, he either mixes the dough or prepares the bread in the bundt pan and lets it rise in the refrigerator overnight. In the morning, he continues preparing the bread and/or baking it.

Uppama/Savory Cream of Wheat

I do not like the texture of cooked oatmeal or cream of wheat, however, this savory dish is a family favorite. The recipe is based on "Zakiya's Uppama" from Madhur Jaffrey's World of the East Vegetarian Cooking. The original recipe calls for cabbage, potatoes, and onions. So we will have leftovers, I add more vegetables and double the cream of wheat. I use vegetables that are ripe in our garden or that I have on hand. The following version calls for yellow squash since squash is ripe now. Later in the summer, I make it with okra, and I use carrots other times of the year.

Indian Ingredients

Black mustard seeds, asafoetida, channa dal, urad dal, and curry leaves are available at an Indian grocery. If you do not have black mustard seeds, substitute yellow mustard seeds. You can omit the asafoetida and curry leaves. Instead of channa and urad dal, you can use cashews.

Texture

The final texture of the dish is dependent upon the water in the vegetables you cook and how much water you add. Some people like their uppama dry while others prefer it wetter. Vary the water to your taste.

Ingredients
2 TbspVegetable oil
1/2 TspBlack mustard seeds
pinch Asafoetida
1 Dried Cayenne pepper
1 TbspChanna dal
2 TbspUrad dal
1 Onion, chopped, about 1 1/2 cups
1/4 LbPotato, about 1 medium sized potato, peeled and diced
1/2 LbYellow crookneck squash, chopped
1 CupFrozen peas
1 TbspFresh ginger, grated
1 Jalapeno pepper, finely chopped
6 Curry leaves
2 TspSalt
2 CupsCream of wheat
2 CupsHow water, approximate
2 TbspCilantro, finely chopped
Directions
  1. Heat oil on high in a large pot. Add mustard seeds. When seeds pop, add dried cayenne pepper, channa dal, and urad dal. Cook until dals begin to brown, stirring often.
  2. Reduce heat to medium high, add onions, and cook for 1-2 minutes.
  3. Add potatoes and cook for 1-2 minutes. Stir to prevent potatoes sticking.
  4. Add squash, frozen peas, ginger, curry leaves. Stir to mix. Cook 1-2 minutes.
  5. Reduce heat to medium-low. Cover and cook until vegetables are cooked, about 10 minutes. Stir and check every 5 minutes.
  6. When veggies are cooked, add salt. Turn heat to medium high. Add cream of wheat, and stir to mix. Cook until cream of wheat is lightly roasted about 5 minutes. Do not brown cream of wheat.
  7. Reduce heat to medium low, add hot water about a 1/4 cup at a time. Stir and cook until water is absorbed before adding more water.
  8. Turn off heat, cover, and let sit 5 minutes. Sprinkle chopped cilantro on top and fluff with a fork before serving.

Wednesday, June 5, 2013

Madhur Jaffrey's Indian Cooking

My son is home from college for the summer. Because he likes to play games, I challenged him to write a review of a game. In return, I agreed to write a cookbook review. I think I have the easier job since I have been cooking from Madhur Jaffrey's Indian Cooking book for almost 25 years.

My first Indian cookbooks were gifts mailed to me from my Indian in-laws. Madhur Jaffrey's book was the first Indian cookbook I used that was intended for Americans. It was easier to use than my Indian ones since I did not have to worry about Indian cup sizes, unusual spice and vegetable names (e.g., haldi for turmeric, lady's finger for okra), or temperatures in marks.

The introductory material in Indian Cooking including ingredient descriptions and techniques is informative. I like the color pictures of selected dishes and the author's recipe introductions. The English recipe titles with Indian equivalent names below make the book accessible for those unfamiliar with the Indian dishes. The term pulses for beans and peas was new to me when I first read the book.

The detailed ingredient list and precise directions guide beginning Indian cooks to successful results. I had problems with the direction "fry until all the water evaporates and you see the oil again", probably because I use less than the recommended amount of oil I.

The serving suggestions encouraged me to try adding an Indian dish to meals. After I had experience, the Indian meal guidelines were are helpful.

Many of our family favorites come from this book. Every year after Easter, I make "Hard-boiled Eggs in a Spicy Cream Sauce" or "Vinegared Eggs" with our dyed Easter eggs. "Chicken with Cream" is our standard main dish when we invite friends over for an Indian dinner. For Thanksgiving, I cook "Sweet Yellow Rice" as a side dish. Even friends, who were hesitant to try Indian food, have enjoyed "Gujerati-style Cabbage with Carrots" when I brought it to potlucks. My husband and kids enjoy "Vermicelli Pudding" for dessert after an Indian meal, however I make it with vermicelli from an Indian grocery store.

I recommend this book for friends interested in Indian cooking, and I have given it as gifts. The book's size, approximately 200 pages, is not overwhelming for anyone who wants to try Indian cooking. It contains a variety of meat, vegetables, rice, bread, dessert, and condiment recipes. Some of the dishes are similar to ones served in Indian restaurants (e.g., "Tandoori-style" Chicken" and "Sour Chickpeas") and others more like the home cooking my husband grew up eating (e.g., "Rice with Yellow Split Peas" and "Sweet and Sour Okra") .

Check out my son's review of the the video game Tiny and Big or Cutting Down EVERYTHING

Monday, June 3, 2013

Congratulations Graduates!

Congratulations to all the Spring 2013 graduates especially my son, my daughter, their friends, and our relatives!

My family had an exciting spring. My son graduated from the Terry College of Business at the University of Georgia with a Bachelor of Business Administration degree in accounting. Two weeks later, my daughter graduated from Norcross High School, completing the International Baccalaureate program.

In the fall, my son will continue at UGA working on his Master of Accountancy (MAcc). My daughter will start Georgia State University studying nursing and pre-med.

A Graduation Note for My Kids

You should be proud of your accomplishments. I am inspired by your achievements. Instead of a traditional graduation gift, I wanted to spend time creating a special gift for you. Since family meals and eating well are important to our family, I created a recipe blog for you.

I am looking forward to adding recipes made with fresh vegetables from our garden this summer and holiday favorites in the fall. Let me know what favorites you would like me to include.

Love,

Mom