Showing posts with label Indian. Show all posts

Monday, January 27, 2014

Indian Tofu with Cream Sauce

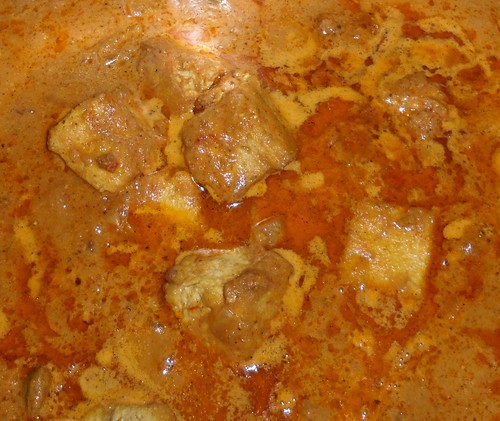
Tofu in Indian cream sauce

My vegetarian daughter came home from college this past weekend. I used the other half of a batch of Indian Cream Sauce with Garlic, Ginger, and Tomatoes that I had stored in the freezer to prepare this dish.

The dish is a variation of my standard Indian company entree, chicken with cream sauce. The tofu version has an extra 1/4 teaspoon black pepper added to the sauce. My husband, daughter, and I enjoyed the meal. I am looking forward to trying the sauce with paneer and boiled eggs.

Ingredients
1 LbFirm tofu, cut into 1" cubes, about 32 cubes
1 TspSalt for marinade
2 TspsGround cumin
1 TspGround coriander
1/2 TspGround turmeric
1/2 TspGround red or cayenne pepper
2 TbspsVegetable oil for marinade
3-5 TbspsVegetable oil, for browning tofu, as needed
4 cupsIndian cream sauce with garlic, ginger, and tomatoes
1/2 CupWater
1/2 Cupheavy cream
1 TspSalt for sauce
2 TspsGaram masala
1/4 TspGround black pepper
3-6 PodsCardamon, lightly crushed, optional
Directions
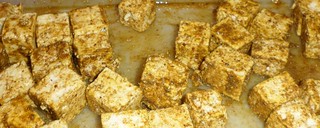
  1. Put tofu pieces in a flat container with a lid. Mix 1 teaspoon salt, cumin, coriander, turmeric, and cayenne in small bowl. Sprinkle spices on top of tofu. Add 2 tablespoons vegetable oil, cover, and shake to mix. Put in fridge, and marinate overnight or for at least one hour.
    Marinating tofu
  2. In a large pot, heat 3 tablespoons oil on medium high. Add as many tofu pieces as will fit in a single layer. Turn to brown on all sides. Remove browned pieces. Continue until all tofu is browned. Add more oil as needed.
  3. Add water and Indian cream sauce to pot. Bring to a simmer. Add tofu, and simmer 10 minutes.
  4. Add cream, 1 teaspoon of salt, black pepper, garam masala, and cardamon pods, if desired. Simmer for about 10 minutes until sauce is slightly thick and creamy. Stir often.
  5. Adjust seasonings to taste before serving. Serve over rice.

Thursday, January 23, 2014

Indian Chicken with Cream Sauce

Printer friendly page

One of my standard Indian company dishes is chicken with cream sauce. Since my kids are vegetarian, I developed a cream sauce recipe that can be used for both a chicken dish and a vegetarian dish. This recipe uses the cream sauce described in my previous post Indian Cream Sauce with Garlic, Ginger, and Tomatoes.

Chicken

I usually buy chicken leg quarters in a 10 pound bag. The quarters are tasty and a good value. I use the chicken skin for stock and cut thighs into 2 pieces.

My husband and I were joking that there are 10 leg/thigh pieces in a 10 pound bag. This is about right. The last time we bought chicken, there were 11 leg quarters in the 10 pound bag.

Chicken stock

It is easy to make chicken stock. Cover chicken skin and bones with water. Add onions, and bring to a boil. Turn heat to low and simmer. When stock is done, stain off liquid and refrigerate. The fat will rise to the top and can be removed the next day.

I think stock tastes better if you simmer it for a long time, 2 or more hours. My husband prefers to simmer his only 1 hour. When I made stock for this dish, I added garlic and ginger to the stock to repeat the garlic and ginger flavors of the tomato sauce.

Ingredients
3 LbsChicken, about 3-4 leg quarters, skinned and cut in pieces
1 TspSalt
2 TspsCumin
1 TspCoriander
1/2 TspTurmeric
1/2 TspGround red or cayenne pepper
4-6 TbspsVegetable oil
4 CupsIndian cream sauce with garlic, ginger, and tomatoes
1 CupChicken stock or water
1/2 CupHeavy cream
1 TspSalt
2 TspsGaram masala
3-6 PodsCardamon, lightly crushed, optional
Directions
  1. Skin chicken and cut into pieces. Put in bowl to marinate. Prick with a knife.
  2. Mix 1 teaspoon salt, cumin, coriander, turmeric, and cayenne in small bowl. Sprinkle spices on top of chicken. Put in fridge, and let marinate overnight or for at least one hour.
  3. In a large pot, heat oil on medium high. Add as many chicken pieces as fit in single layer and brown pieces on all sides, 30 seconds to 1 minute per side. Remove browned pieces. Continue until all pieces are browned. Add more oil as needed.
  4. Add 1 cup chicken stock and Indian cream sauce to pot. Bring to a simmer. Add chicken, and simmer 20-30 minutes until chicken is cooked.
  5. Remove chicken. Bring sauce to a boil and cook to thicken, about 10 minutes. Stir sauce often to prevent sticking.
  6. Add cream, 1 teaspoon of salt, garam masala, and cardamon pods, if desired. Simmer for about 10 minutes until sauce is slightly thick and creamy. Stir often. The dish can be prepared ahead up to this point.
  7. To serve, bring sauce to a simmer. Add chicken and heat until warm. Adjust seasonings to taste before serving. Serve over rice.

Saturday, January 18, 2014

Indian Cream Sauce with Garlic, Ginger, and Tomatoes

Printer friendly page

One of my standard company recipes for an Indian dinner is "Chicken with Cream" from the cookbook Madhur Jaffrey's Indian Cooking. My kids are vegetarian, so I also make a vegetarian side dish.

My husband suggested making the cream sauce separately, so I could use it for both a chicken dish and a vegetarian dish. Here is the adapted sauce recipe that I used for a company dinner the other night.

Ingredients
2 BulbsGarlic, about 24 cloves, peeled
4" PieceGinger, peeled and cut into thick slices
1 CupWater
3 TbspsVegetable oil
3 Onions, large, finely chopped, about 3-3 1/2 cups
4 TspsCumin
4 TspsCoriander
1 TspTurmeric
1 TspGround Red or cayenne pepper
1 28 oz. CanCrushed tomatoes
1 CupYogurt
2 CupsWater
1 TspSalt
Directions
  1. Blend garlic and ginger in 1 cup of water. For blending, I use an hand-held immersion blender.
  2. In a large pot, heat oil on medium high heat. Add onions, and cook until onions are golden and edges start to brown, about 5-10 minutes.
  3. Add garlic ginger liquid. Cook, stirring occasionally, until liquid evaporates about 10 minutes.
  4. Add spices and stir to mix
  5. Turn heat to medium low. Add crushed tomatoes and cook 5 minutes.
  6. Add yogurt 1/4 cup at a time. Stir until yogurt is incorporated before adding more yogurt.
  7. Add 2 cups water and bring to a simmer. Turn heat to low, cover and simmer 30 minutes.
  8. Turn off heat, and add salt.

Friday, October 18, 2013

Ridge Gourd Experiments/Standard Indian Vegetable Recipe

I volunteer at Pinckneyville Middle School's garden. When my husband visited India earlier this year, I asked him to bring home Indian vegetable seeds. I thought the students would enjoy learning about different vegetables.

We planted the vegetables in our home garden at the beginning of the summer. When school started in the fall, there were ridge gourd vines circling the fence around our garden.

I brought the first ripe ridge gourd to a garden club meeting to show the students. The kids and master gardeners, Mim Harris and Kelli Clay, advising the club wondered what the gourd tasted like. We tried it and thought it tasted like a cross between a zucchini and a cucumber with a slightly bitter skin.

At another meeting, we enjoyed peeled, raw slices and ridge gourd chutney. We talked about ideas for preparing the gourd. Anyone who wanted took a gourd home after agreeing to report how they ate it. Some ate it raw, some sauteed it with olive oil and garlic, and some used it in soup.

Cutting the Ridge Gourd

To prepare ridge gourd, I cut off the ridges using a paring knife. I peel young, tender gourds using a swivel vegetable peeler. I use a fixed blade peeler for older gourds with tougher skin.

My Experiments

Since this was a new vegetable for me, the first dish I made was Indian ridge gourd using my standard Indian vegetable recipe that I have included below. I also added chopped up pieces of gourd to my Indian lentils (umptee).

The ridge gourd dish my husband remembered eating while he was growing up in India was chutney made with ridge gourd peel and sesame seeds. From the blog Priya's Versatile Recipes, I made Ridgegourd Peels N Sesame Seeds Chutney. When we visited my son at UGA, I brought him some of this chutney and other homemade goodies. Recently when he was home visiting, he told me he particularly liked this dish. Next time I make this dish, I plan to remove the outer strings of the gourd which resemble celery strings.

Another dish my husband and I enjoyed was Ridge Gourd Chutney from the blog Rak's Kitchen. The middle school students tried this as a dip with pieces of pitas.

My daughter who attends Georgia State University liked the pasta dishes I made with ridge gourd, olive oil, garlic and a combination of the following: tomatoes, peppers, and/or cream. I also tried using the gourd in soups and as an omelet filling. The slightly bitter flavor of the gourd did now work well in the omelet.

I am currently drying some gourds for loofah. I plan to save the seeds, so students can grow them in the school garden next year.

Standard Indian Vegetable Recipe

I learned this recipe from my husband and in-laws. I use it to cook a variety of vegetables: potatoes, cauliflower, spinach, peas. I also use it for mix of vegetables (e.g., spinach and potatoes, potatoes and peas).

Ingredients
3-4 Ridge gourds, peeled and chopped into 1/2-3/4 inch pieces, about 4 cups
1 MediumOnion, chopped, about 1 cup
1-2 Jalapeño pepper, finely minced, to taste
2 TbspVegetable oil
1/4 TspMustard seeds, black preferred
PinchAsafoetida
1/8 TspTurmeric
1 CupTomatoes, chopped
1/8 TspCayenne pepper
1/4 TspBlack (Goda) masala
1/2 TspSalt
2 TbspCilantro leaves, chopped
Directions
  1. In a large pot, heat oil and mustard seeds on medium high heat. When mustard seeds pop, add onions. Cook until onions are translucent, about 3-5 minutes. Turn heat down if onions start to brown.
  2. Add turmeric and asafoetida and cook for 30 seconds.
  3. Add ridge gourd and jalapeño peppers. Stir to mix. Cover, turn heat to low, and cook 5 minutes.
  4. Add salt, cayenne, and black masala. Stir to mix. Cover and cook 5 more minutes.
  5. Using a fork, check to see if vegetables are ready. Vegetables are ready when they can be easily pricked with a fork but are still firm. If vegetables are not ready or for softer vegetables, cover and continue cooking for 5 more minutes.
  6. Continue checking and cooking until vegetables are done.
  7. Turn off heat, and top with cilantro before serving.
  8. This same recipe can be used for other vegetables including potatoes and cauliflower. Add 2 tablespoons of water for vegetables with low moisture content. If needed, add more water while cooking.
Friday, June 21, 2013

Father's Day Monkey Bread and Uppama/Savory Cream of Wheat

This past Sunday was my husband's birthday as well as Father's Day. To celebrate my son and I made him a special brunch. My son baked monkey bread, and I cooked uppama, savory Indian cream of wheat.

Monkey Bread

My son likes to make monkey bread from scratch for special occasions (e.g., Mother's Day, Father's Day, Christmas). He uses the recipe in the article "Let's Make Monkey Bread" from the December/January 2005 edition of Family Fun magazine. You can find it here Let's Make Monkey Bread. Since it is time consuming to make, he either mixes the dough or prepares the bread in the bundt pan and lets it rise in the refrigerator overnight. In the morning, he continues preparing the bread and/or baking it.

Uppama/Savory Cream of Wheat

I do not like the texture of cooked oatmeal or cream of wheat, however, this savory dish is a family favorite. The recipe is based on "Zakiya's Uppama" from Madhur Jaffrey's World of the East Vegetarian Cooking. The original recipe calls for cabbage, potatoes, and onions. So we will have leftovers, I add more vegetables and double the cream of wheat. I use vegetables that are ripe in our garden or that I have on hand. The following version calls for yellow squash since squash is ripe now. Later in the summer, I make it with okra, and I use carrots other times of the year.

Indian Ingredients

Black mustard seeds, asafoetida, channa dal, urad dal, and curry leaves are available at an Indian grocery. If you do not have black mustard seeds, substitute yellow mustard seeds. You can omit the asafoetida and curry leaves. Instead of channa and urad dal, you can use cashews.

Texture

The final texture of the dish is dependent upon the water in the vegetables you cook and how much water you add. Some people like their uppama dry while others prefer it wetter. Vary the water to your taste.

Ingredients
2 TbspVegetable oil
1/2 TspBlack mustard seeds
pinch Asafoetida
1 Dried Cayenne pepper
1 TbspChanna dal
2 TbspUrad dal
1 Onion, chopped, about 1 1/2 cups
1/4 LbPotato, about 1 medium sized potato, peeled and diced
1/2 LbYellow crookneck squash, chopped
1 CupFrozen peas
1 TbspFresh ginger, grated
1 Jalapeno pepper, finely chopped
6 Curry leaves
2 TspSalt
2 CupsCream of wheat
2 CupsHow water, approximate
2 TbspCilantro, finely chopped
Directions
  1. Heat oil on high in a large pot. Add mustard seeds. When seeds pop, add dried cayenne pepper, channa dal, and urad dal. Cook until dals begin to brown, stirring often.
  2. Reduce heat to medium high, add onions, and cook for 1-2 minutes.
  3. Add potatoes and cook for 1-2 minutes. Stir to prevent potatoes sticking.
  4. Add squash, frozen peas, ginger, curry leaves. Stir to mix. Cook 1-2 minutes.
  5. Reduce heat to medium-low. Cover and cook until vegetables are cooked, about 10 minutes. Stir and check every 5 minutes.
  6. When veggies are cooked, add salt. Turn heat to medium high. Add cream of wheat, and stir to mix. Cook until cream of wheat is lightly roasted about 5 minutes. Do not brown cream of wheat.
  7. Reduce heat to medium low, add hot water about a 1/4 cup at a time. Stir and cook until water is absorbed before adding more water.
  8. Turn off heat, cover, and let sit 5 minutes. Sprinkle chopped cilantro on top and fluff with a fork before serving.

Monday, March 18, 2013

Make Your Own Yogurt

While visiting India, I enjoyed homemade yogurt in different dishes. Some of my favorites were vegetables, yogurt, and spices mixed in a raita, curd rice served to aid digestion after a spicy meal, and shrikhand, saffron flavored sweetened strained yogurt, similar to Greek yogurt.

I started making my own yogurt after receiving an EasiYo yogurt maker from my aunt as a Christmas present.

EasiYo

The EasiYo yogurt maker is a thermal carafe with a container for yogurt that fits inside it. The space around the container is filled with boiling water to help the yogurt set. The yogurt maker came with powdered, instant yogurt mix. I enjoyed the initial packages. Since refills were not easily available, I adopted the following yogurt making technique using fresh milk, powdered milk, and a tablespoon of store bought yogurt with active cultures.

If you do not have an EasiYo, you can substitute an insulated water jug. As a test, I made two cups, a half batch of the following yogurt recipe, in my daughter's half-gallon Rubbermaid water cooler that she used for band practice. I put an empty, 8 ounce plastic yogurt cup in the bottom of the cooler topped with a one quart glass canning jar containing the heated milk and yogurt. I added boiling water, closed the container, and let it set.

Yogurt Culture

To start my yogurt the first time, I use a tablespoon of store bought yogurt with active cultures. Then the next time, I use a tablespoon of my old yogurt in the new batch. I also keep a tablespoon frozen. If I use all my yogurt or have a yogurt flop, I can thaw this tablespoon and use it for a new batch.

Dry Milk

Especially when using low-fat milk, the yogurt I made was thin; so I started adding dry milk to get a thicker result. I use instant nonfat dry milk from Aldi or Wal-Mart.

Sweet Yogurt

I usually make plain yogurt. For sweet yogurt, add sugar to room temperature milk before putting it to set. Try a half-cup sugar to 4 cups milk for a slightly sweet yogurt.

Boiling Milk

Be careful when you boil the milk to make the yogurt. When it gets hots, the milk rises very quickly. If you are not careful, the hot milk can easily spill over unto the stove and is a mess to clean up. After cleaning a sticky, milky stove a couple of times, I learned it is easier to watch the pot when heating milk than cleanup after it boils over.

I use a heavy 2 quart stainless steel pot that I have reserved for milk and sweets to heat milk for yogurt. Although I thought I cleaned my pots well, I had problems with funny tastes in my yogurt before I reserved a pot for this use.

The worst part of making yogurt is cleaning the dirty pot. I soak the pot and scrub it with steel wool and AJAX to get it clean.

Yogurt Flops

Occasionally yogurt fails to set because either the milk was not heated well enough or was too hot when the yogurt was added. If this happens, you can use the milk in pancakes or quiche.

Ingredients

4 Cups Milk, 2% or whole
1/2 Cup Dried Milk
1 Tbsp Yogurt with active cultures
1/2 Cup Sugar, optional
Directions
  1. Using a hand held blender, blend dry milk and 1 cup milk together.
  2. In a heavy pan on high heat, heat all the milk until it boils. Watch carefully to prevent it boiling over. You should see tiny bubbles forming around the edge of the pan. After this happens, the milk will rise quickly. Immediately, turn heat to low. If needed, lift pan from burner to prevent milk from boiling over.
  3. Heat milk on low for 1 minute.
  4. Allow milk to cool to room temperature. In container or jar, mix yogurt and milk. If desired, add sugar. Put container or jar in EasiYo or insulated container and surround with boiling water. Let sit for 8 hours. Store set yogurt in refrigerator.

Tuesday, March 5, 2013

Indian Cabbage with Coconut

I made this dish last night. It takes less than 10 minutes to cook once you have the vegetables chopped. Your dad says that green beans are often cooked in a similar way.

Coconut

When I was growing up, the only type of coconut I knew was Baker's sweetened shredded coconut that was used on cakes and in baked sweets. Since I did not like the sweetness and texture of this product, I thought I did not like coconut.

Since meeting your dad, I have enjoyed eating fresh and dried coconut in Indian dishes. One of the kitchen tools your grandparents brought us when they visited from India was a coconut grater.

I use dry, desiccated, powdered coconut in this recipe. You can buy this coconut at the local Ingles near the chocolate chips and other baking supplies; however, you get about twice the amount for the same cost at an Indian grocery or HMart. 

Ingredients

4 Cups Cabbage, finely chopped
½ Onion, large, finely chopped
1Hot pepper, serrano or jalapeƱo, finely chopped
2 Tbsp Vegetable oil
¼CupCoconut, dry powdered
1TspSalt
1/8 - ¼TspCayenne pepper
1TbspCilantro leaves, chopped

Directions
  1. Heat oil on high. When hot, add onions. Cook until onion edges start to brown, about 3 minutes.
  2. Turn heat down slightly. Add cabbage, hot pepper, coconut, salt, and cayenne pepper. Stir to mix. Cook about 3 minutes, stirring occasionally, until cabbage is slightly soft.
  3. Serve topped with chopped cilantro leaves.
For beans, add water in step 2, cover your pot, and slightly steam the beans. 

Monday, March 4, 2013

Indian Tomato Chutney

This is one of our favorite condiments. We use it like ketchup and dip roasted potatoes in it. I also serve it on the side with rice and lentils (i.e., dal) for a little zing. Since my kids do not like mayonnaise, they use it on their cheddar cheese sandwiches and with cream cheese on a bagel. My kids do not share their dad’s appetite for peanut butter and tomato chutney sandwiches and were surprised when he packed them for their school lunch. This recipe is based the “Tomato Chutney” recipe in Vasantha Moorthy’s The Vegetarian Menu Cookbook, a cookbook your dad brought back from one of his trips to India.

One of the things I love about growing vegetables is the opportunity to try new recipes. To avoid wasting produce, I try different ways to preserve vegetables. I first made this recipe when we had a surplus of fresh garden tomatoes. It has since become a family standard, and we usually have a jar in the refrigerator. My son has a jar in his dorm fridge, too. During the summer, I make and freeze plenty of chutney. Although I have not tried yet, I think you could can this chutney. You can buy black mustard seeds at an Indian grocery store.

Since it highlights our Indian-American heritage, this is one of the recipes we contributed to your great aunt’s 70th birthday cookbook. We have also shared jars of this chutney with our family friends. It is a particular favorite of one of my daughter’s friends.

Ingredients


2 1/3
Pounds
Tomatoes, peeled
6

Green Chilies (Thai, Serrano or jalapeno), silt
2
Tsp
Cayenne pepper
½
Tsp
Turmeric
2/3
Cup
Vegetable oil
2/3
Cup
Vinegar
1 ½
Tbsp
Salt
1/3
Cup
Sugar
6
Cloves
Garlic
1”
Piece
Ginger
1
Tbsp
Cumin Seeds
½
Tbsp
Mustard Seeds, black preferred

Directions
  1. Using a knife, make an “X” on the bottom of each tomato. Heat water until boiling in a small pot. With a slotted spoon, put each tomato in boiling water for 10 seconds. When tomatoes are cool, peel, remove stem area, and cut small tomatoes into 8 pieces and large ones into 16 pieces. Set aside in a bowl.
  2. Using a hand-held bender grind garlic, ginger, cumin seeds, mustard seeds, and vinegar together.
  3. Heat the oil. Fry hot peppers for 1 minute. Then, slowly add ground spice mixture. Be careful since the paste splatters. Fry paste until oil surfaces.
  4. Add the tomatoes and any accumulated juices. Cook until tomatoes turn soft.
  5. Add the salt, sugar, cayenne pepper, and turmeric, and cook a few minutes.
  6. Simmer stirring constantly until thick gravy is formed. Taste and adjust spices if necessary. I usually get your dad to taste for me. Optional, remove pepper skins from chutney.
  7. Pour in a clean jar and store in the fridge or freezer.

Saturday, February 2, 2013

Yellow Potatoes/ Potato Bhaji/Indian Ginger Potatoes

Since my kids were little, this has been one of their favorites. I usually refer to the dish as yellow potatoes, but their dad calls it potato bhaji. He uses bhaji to mean an Indian vegetable.

This is the first Indian dish I learned to cook. My in-laws, my kids' Aji and Azobar (i.e., Indian grandmother and grandfather) taught me how to make it when they visited from India in 1988. Since it was the only Indian dish I cooked then, I used to bring these potatoes when my husband and I went to the Research Triangle Park Maharastra Mandal's functions.

UGA Taste of Home 201

In the summer of 2011, my son learned to cook this dish and typed up the included recipe. I entered the recipe in UGA's Taste of Home competition. Selected entries are made in the university's dining halls. Our winning recipe was served at dinner in Snelling Commons on December 1, 2011, taste-of-home/snelling-2011. Unfortunately due to a schedule conflict, my son did not get to try the school’s Indian Ginger Potatoes. I wonder how UGA’s version compares to ours. We enjoyed receiving a commemorative plate and copy of UGA’s recipe that makes 8600 serving as a prize.

Boil Potatoes

Potatoes are a staple in our house. You should be able to buy potatoes for 50¢ a pound. If you watch sales or shop at Aldi, you can get them for 30¢ a pound.

Select potatoes that are similar in size, so they will be ready at the same time. Wash them in water and scrub with a vegetable brush. Place them in a pot and cover with salted water, about 1 Tbsp in a 4 quart pot. Boil covered for 25-40 minutes until they feel tender when pricked with a fork. I drain them by carefully holding the pot and lid and pouring the water down the sink. Then I let the potatoes cool uncovered in the pot. If you want peeled potatoes, it is easier to peel them while they are still warm.

I usually cook as many potatoes as will fit in a single layer in the pot at a time. Extras can be used for other meals or eaten as a snack.

Ingredients
2TbspsVegetable oil
1MediumOnion, peeled and chopped
1/2 - 1Hot green pepper, finely chopped
1-inchPiece of fresh ginger, peeled and grated
1/4TspTurmeric
1/8TspAsafoetida, optional
4MediumPotatoes, (adult fist sized), boiled, peeled, and cut into 1 inch cubes
1-1 1/2TspsSalt
1/4TspGround red or cayenne pepper
1/8CupWater
2TbspsCilantro leaves, chopped
Directions
  1. Heat oil on high. Add onions, hot pepper, and ginger; and cook about 3 minutes until onions start to brown.
  2. Add turmeric and asafoetida to pan, and cook 1 minute.
  3. Turn heat to medium low. Add potatoes, salt, red pepper, and water. Cover and cook about 10 minutes until potatoes are hot. Check after 5 minutes. Add more water, if needed, to prevent sticking.
  4. Serve topped with chopped cilantro leaves.