Wednesday, July 30, 2014

Pinckneyville Garden Iced Mint Tea

Plenty of mint is growing in the Pinckneyville Middle School garden. Teachers enjoyed this refreshing drink at a spring garden breakfast. Stop by on Open House day this Thursday for a sample. The following recipe makes 1/2 gallon of tea.

Sugar

I like the tea made with 1/3 cup of sugar. Some of the students preferred a sweeter version made with 1/2 cup of sugar. If you plan to serve it over lots of ice, use more sugar.

Ingredients
1/3 - 1/2CupsSugar
2/3CupsFresh mint leaves, lightly packed
2CupsBoiling Water
6CupsCool Water
Directions
  1. Rinse mint leaves in cool water to remove dirt. Remove leaves from stems, and lightly pack leaves in the measuring cup.
  2. Dissolve sugar in boiling water. Add mint leaves and seep for 15-20 minutes.
  3. Strain leaves and add cool water to make 1/2 gallon.
  4. Refrigerate until cool. If desired, serve over ice.

Monday, April 7, 2014

Heavenly Hash Cake

Heavenly hash topHeavenly hash side

When I was growing up this was one of my favorite desserts. The candy like marshmallow chocolate topping helps the cake stay fresh. As part of its College Care service, my mom's business, Nancy's Corner, used to deliver this cake to local college students. I made this cake for my daughter's birthday this year. To test that it ships well, I sent one to my nephew for his 7th birthday.

My mom uses the "Heavenly Hash Cake" recipe from The Cotton Country Collection cookbook by the Junior League of Monroe, LA. I started with the NOPSI recipe from the cookbook From Woodstoves to Microwaves Cooking with Entergy. After consulting with my mom, I came up with my version for an 8"x8" cake based on these recipes. I substituted flour and baking powder for self-rising flour, heated the milk and butter before adding it to the powdered sugar and cocoa, and used large marshmallows.

Recipe Name

The recipe reminds me of the chocolate marshmallow Elmer's Heavenly Hash eggs I received in my Easter basket every year when I was young.

Helpful Hints

For the chocolate topping, heat the butter with the evaporated milk before adding to powdered sugar and cocoa. This results in a pourable frosting. Mixing cold or room temperature milk with the butter can cause the butter to re-solidify resulting in a lumpy topping.

Cut your marshmallows in advance, so they slightly melt when put on on cake.

Ingredients
1/2CupButter, one stick
1CupSugar
2Eggs
1TspVanilla
3/4CupWhite flour
1/8CupCocoa powder
3/4TspBaking powder
21-24Large marshmallows, about 1/2 a 10 ounce bag
2CupsPowdered sugar
1/8CupCocoa powder
1/8CupButter, 2 Tbsps
1/4CupEvaporated Milk
Directions
  1. Grease and flour an 8" x 8" baking pan.
  2. Preheat oven to 350 degrees.
  3. Sift together flour, 1/8 cup cocoa powder, and baking powder.
  4. Using an electric mixer, cream together butter and sugar. Beat until light and fluffy.
  5. Add eggs, one at a time, and mix until smooth.
  6. Add vanilla and mix.
  7. Slowly add sifted ingredients and mix.
  8. Pour the thick batter into the prepared pan.
  9. Bake 30 to 35 minutes.
  10. While baking, cut marshmallows in half using kitchen scissors.
  11. Immediately after removing the cake from the oven, put cut marshmallows on top of cake in a single layer, cut side down.
  12. For topping, sift together powder sugar and 1/8 cup cocoa powder.
  13. Heat butter and evaporated milk until butter is melted. I do this in a cup in the microwave.
  14. Using an electric mixer, mix butter and milk into sugar and cocoa until smooth.
  15. Pour topping on top of marshmallows.
  16. Allow to sit overnight or until topping is hard.
' >

Tuesday, February 18, 2014

Oatmeal Wheat Chocolate Chip Cookies

Chocolate Chip Cookies

This is the chocolate chip cookie recipe I use. It is based on the "Everybody-Loves-Chocolate-Chip Cookies" recipe in the Better Homes and Gardens Cookies for Kids cookbook. I added instant oats to the recipe and replaced part of the white flour with wheat flour. I think the wheat flour and oats give the cookies a nutty flavor even if there are no nuts in the cookies. I always use butter when I make these cookies.

For variety, use a different type of baking chip or a combination of chips. On Saturday, I made a regular batch for my daughter to share with her winter guard team. I used semi-sweet chocolate chips, chopped up Wilton Candy Cane Colorburst Melts, and Holiday Mint M&M's. in the batch I sent to my son who is taking the first part of the CPA exam on Friday,

This recipe make about 4 dozen 2" cookies or 3 dozen 3" cookies. Note the different bake times in the recipe.

Brown Sugar

Brown sugar should be firmly packed in the cup when measuring it.

Pinch

A pinch is just a little bit or about 1/8 a teaspoon

Ingredients
1/2CupButter, 1 stick
1/2CupVegetable shortening
1CupBrown sugar
1/2CupSugar
2Eggs
1 1/2TspsVanilla
1TspBaking soda
PinchSalt
1/2CupInstant oats
1CupWheat flour
1 1/2CupsWhite flour
1CupChocolate chips
1/2CupNuts, chopped, or extra chocolate chips
Directions
  1. Preheat oven to 375 degrees.
  2. Using an electric mixer, cream together butter, shortening, brown sugar, and sugar. Beat until light and fluffy.
  3. Add eggs and vanilla. Beat until blended.
  4. Add pinch of salt, baking soda, and oats to creamed mixture. Mix well.
  5. Mix in wheat flour.
  6. Mix in white flour.
  7. Batter is stiff. Stir in chocolate chips and nuts by hand.
    Cookie Batter
  8. For 2" cookies, rolls balls about 1 1/4" in diameter and place on baking sheets. For 3" cookies, roll balls about 1 1/2" in diameter. I bake 12 cookies on a AirBake cookie sheet.
    Cookies on Trap
  9. Bake 2" cookies about 10-12 minutes and 3" cookies, 12-14 minutes.
  10. Immediately remove from pan.
    Baked 2" Cookies

Saturday, February 8, 2014

Cinnamon Nut Coffee Cake

Cinnamon Nut Coffee Cake

When I was growing up, my mom occasionally made Bisquick Streusel Coffee Cake for a breakfast treat. Since I usually do not have Bisquick, I was happy to find a similar Coffee Cake recipe in the February 2001 issue of Family Fun magazine.

I altered my version by using part wheat flour and adding an extra tablespoon of butter in the batter. In the topping, I reduced the cinnamon and added nutmeg. I also increased the baking time since my cake takes 40 to 45 minutes to bake versus the 25 to 30 in the original recipe.

Ingredients
1 1/3 CupsWhite flour
2/3 CupWheat flour
1 TspBaking powder
1/2 TspBaking soda
1/2 TspSalt
3/4 CupSugar
2 TbspsMelted butter
1 Egg, room temperature
1 1/2 CupsButtermilk
Topping
1/3 CupBrown sugar
1/2 CupChopped nuts (pecans or walnuts)
1 TspGround cinnamon
1/4 TspGround nutmeg
Directions
  1. Preheat oven to 375 degrees. Grease and flour a 9-inch cake pan.
  2. In a medium-sized bowl, mix brown sugar, chopped nuts, cinnamon, and nutmeg. Set aside.
  3. In a large bowl, mix white flour, wheat flour, baking powder, baking soda, salt, and sugar.
  4. In a medium-sized bowl, mix melted butter, egg, and buttermilk.
  5. Add the buttermilk mixture to the dry ingredients and stir to mix. Pour the batter into the cake pan.
  6. Sprinkle topping evenly over batter. Press topping gently into batter so that it is moist. If the topping is too dry, it crumbles off the cake. If desired, run a knife through the batter and topping to get a swirl effect.
  7. Bake for 40 to 45 minutes or until a toothpick inserted into cake comes out clean.

Monday, January 27, 2014

Indian Tofu with Cream Sauce

Tofu in Indian cream sauce

My vegetarian daughter came home from college this past weekend. I used the other half of a batch of Indian Cream Sauce with Garlic, Ginger, and Tomatoes that I had stored in the freezer to prepare this dish.

The dish is a variation of my standard Indian company entree, chicken with cream sauce. The tofu version has an extra 1/4 teaspoon black pepper added to the sauce. My husband, daughter, and I enjoyed the meal. I am looking forward to trying the sauce with paneer and boiled eggs.

Ingredients
1 LbFirm tofu, cut into 1" cubes, about 32 cubes
1 TspSalt for marinade
2 TspsGround cumin
1 TspGround coriander
1/2 TspGround turmeric
1/2 TspGround red or cayenne pepper
2 TbspsVegetable oil for marinade
3-5 TbspsVegetable oil, for browning tofu, as needed
4 cupsIndian cream sauce with garlic, ginger, and tomatoes
1/2 CupWater
1/2 Cupheavy cream
1 TspSalt for sauce
2 TspsGaram masala
1/4 TspGround black pepper
3-6 PodsCardamon, lightly crushed, optional
Directions
  1. Put tofu pieces in a flat container with a lid. Mix 1 teaspoon salt, cumin, coriander, turmeric, and cayenne in small bowl. Sprinkle spices on top of tofu. Add 2 tablespoons vegetable oil, cover, and shake to mix. Put in fridge, and marinate overnight or for at least one hour.
    Marinating tofu
  2. In a large pot, heat 3 tablespoons oil on medium high. Add as many tofu pieces as will fit in a single layer. Turn to brown on all sides. Remove browned pieces. Continue until all tofu is browned. Add more oil as needed.
  3. Add water and Indian cream sauce to pot. Bring to a simmer. Add tofu, and simmer 10 minutes.
  4. Add cream, 1 teaspoon of salt, black pepper, garam masala, and cardamon pods, if desired. Simmer for about 10 minutes until sauce is slightly thick and creamy. Stir often.
  5. Adjust seasonings to taste before serving. Serve over rice.

Thursday, January 23, 2014

Indian Chicken with Cream Sauce

Printer friendly page

One of my standard Indian company dishes is chicken with cream sauce. Since my kids are vegetarian, I developed a cream sauce recipe that can be used for both a chicken dish and a vegetarian dish. This recipe uses the cream sauce described in my previous post Indian Cream Sauce with Garlic, Ginger, and Tomatoes.

Chicken

I usually buy chicken leg quarters in a 10 pound bag. The quarters are tasty and a good value. I use the chicken skin for stock and cut thighs into 2 pieces.

My husband and I were joking that there are 10 leg/thigh pieces in a 10 pound bag. This is about right. The last time we bought chicken, there were 11 leg quarters in the 10 pound bag.

Chicken stock

It is easy to make chicken stock. Cover chicken skin and bones with water. Add onions, and bring to a boil. Turn heat to low and simmer. When stock is done, stain off liquid and refrigerate. The fat will rise to the top and can be removed the next day.

I think stock tastes better if you simmer it for a long time, 2 or more hours. My husband prefers to simmer his only 1 hour. When I made stock for this dish, I added garlic and ginger to the stock to repeat the garlic and ginger flavors of the tomato sauce.

Ingredients
3 LbsChicken, about 3-4 leg quarters, skinned and cut in pieces
1 TspSalt
2 TspsCumin
1 TspCoriander
1/2 TspTurmeric
1/2 TspGround red or cayenne pepper
4-6 TbspsVegetable oil
4 CupsIndian cream sauce with garlic, ginger, and tomatoes
1 CupChicken stock or water
1/2 CupHeavy cream
1 TspSalt
2 TspsGaram masala
3-6 PodsCardamon, lightly crushed, optional
Directions
  1. Skin chicken and cut into pieces. Put in bowl to marinate. Prick with a knife.
  2. Mix 1 teaspoon salt, cumin, coriander, turmeric, and cayenne in small bowl. Sprinkle spices on top of chicken. Put in fridge, and let marinate overnight or for at least one hour.
  3. In a large pot, heat oil on medium high. Add as many chicken pieces as fit in single layer and brown pieces on all sides, 30 seconds to 1 minute per side. Remove browned pieces. Continue until all pieces are browned. Add more oil as needed.
  4. Add 1 cup chicken stock and Indian cream sauce to pot. Bring to a simmer. Add chicken, and simmer 20-30 minutes until chicken is cooked.
  5. Remove chicken. Bring sauce to a boil and cook to thicken, about 10 minutes. Stir sauce often to prevent sticking.
  6. Add cream, 1 teaspoon of salt, garam masala, and cardamon pods, if desired. Simmer for about 10 minutes until sauce is slightly thick and creamy. Stir often. The dish can be prepared ahead up to this point.
  7. To serve, bring sauce to a simmer. Add chicken and heat until warm. Adjust seasonings to taste before serving. Serve over rice.

Saturday, January 18, 2014

Indian Cream Sauce with Garlic, Ginger, and Tomatoes

Printer friendly page

One of my standard company recipes for an Indian dinner is "Chicken with Cream" from the cookbook Madhur Jaffrey's Indian Cooking. My kids are vegetarian, so I also make a vegetarian side dish.

My husband suggested making the cream sauce separately, so I could use it for both a chicken dish and a vegetarian dish. Here is the adapted sauce recipe that I used for a company dinner the other night.

Ingredients
2 BulbsGarlic, about 24 cloves, peeled
4" PieceGinger, peeled and cut into thick slices
1 CupWater
3 TbspsVegetable oil
3 Onions, large, finely chopped, about 3-3 1/2 cups
4 TspsCumin
4 TspsCoriander
1 TspTurmeric
1 TspGround Red or cayenne pepper
1 28 oz. CanCrushed tomatoes
1 CupYogurt
2 CupsWater
1 TspSalt
Directions
  1. Blend garlic and ginger in 1 cup of water. For blending, I use an hand-held immersion blender.
  2. In a large pot, heat oil on medium high heat. Add onions, and cook until onions are golden and edges start to brown, about 5-10 minutes.
  3. Add garlic ginger liquid. Cook, stirring occasionally, until liquid evaporates about 10 minutes.
  4. Add spices and stir to mix
  5. Turn heat to medium low. Add crushed tomatoes and cook 5 minutes.
  6. Add yogurt 1/4 cup at a time. Stir until yogurt is incorporated before adding more yogurt.
  7. Add 2 cups water and bring to a simmer. Turn heat to low, cover and simmer 30 minutes.
  8. Turn off heat, and add salt.

Wednesday, January 15, 2014

Heating Food without a Microwave

Printer friendly page

Our microwave broke last week. My kids have returned to college from their holiday visit, and there are plenty of leftovers in our fridge. I have had to find different ways to heat them. Here are my favorites:

Pressure Cooker

I use my pressure cooker to heat rice, beans, macaroni, and chili. By using two straight-side pans and an extra steamer tray, I can heat the rice or macaroni in one pan and the beans or chili in another. If you just have a little, you can heat rice and beans in the pan. The advantage of this method is that the food stays warm in the cooker.

Directions
  1. Put water in the bottom of cooker until it covers first steamer tray. Then put in the first pan with food.
  2. Next add another steamer tray and the second pan.
  3. Heat the pressure cooker on high until pressure is reached and weight rattles. Reduce heat slightly and cook for 5 minutes under pressure with weight slightly rattling.
  4. Food is ready to eat when pressure drops and pan can be opened.
Toaster Oven

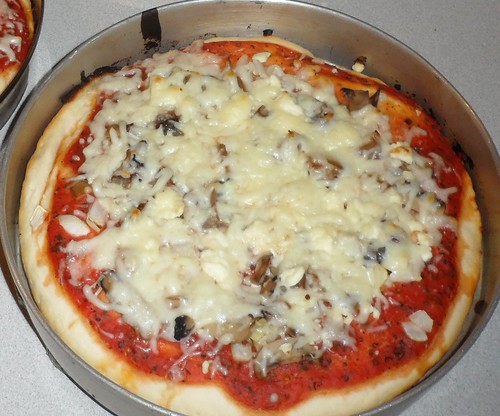
I use a toaster oven to heat pizza slices and bowls of rice and beans. Pizza tastes crunchy and baked and not soggy and chewy like microwaved pizza.

Put pizza slices on a tray, and cover lightly with aluminum foil. Make sure the aluminum does not touch the pizza sauce since tomatoes can corrode aluminum. Heat at 350 degrees for 10-15 minutes depending on size of the slice.

To heat rice and beans, place rice and beans in a stoneware bowl and add a bit of water. Cover with foil, and bake about 10 minutes at 350 degrees.

Skillet

I use a skillet to heat rice and beans together. You can add extra onions and other vegetables to stretch the dish. The same method can be used for chili or pasta sauce and macaroni. Last week I prepared chili mac with sweet potatoes.

Directions
  1. Saute onions, garlic, and other vegetables in oil in skillet. If needed, cover and cook until vegetables are tender.
  2. Add rice and lightly cook until grains are separate.
  3. Add beans, seasonings and extra water. Stir to mix. Cover and heat until food is ready.
Thermos

I usually make a pot of coffee in the morning, and heat up cups during the day. Without a microwave, I use a thermos to keep coffee warm all day. For best results, preheat the thermos with hot water before adding the coffee.

Monday, January 13, 2014

Pan Pizza, Pizza Hut Style

Pan Pizza, Pizza Hut Style

Before my daughter joined the high school band and Friday night football entered our life, fall Fridays were pizza night at our house. I have had good results with the recipe for Pizza Hut pan pizza that I found on-line. I use less oil than the original and add cayenne pepper to the dough.

Since this recipe makes 3 small pizza, it easy to customize the pizza toppings to your family's preferences. My husband and son like jalapeño slices on their pizza. Sometimes I add meat to one for my husband and me.

Two pizza are usually enough for my family of four. The extra pizza can be frozen. I just gave my daughter an extra pizza to back to college with her.

Pizza Sauce

I use jarred pizza sauce or make my own sauce. Use a thick sauce, so the top of the pizza does not get soggy. I like to use strained homemade tomato sauce that I make and freeze in the summer with tomatoes from our garden.

Ingredients
1 1/3CupsWarm water
1TbspDry yeast
1/4CupNon-fat powdered milk
1TbspSugar
4CupsWhite flour
1TspSalt
1/2TspCayenne pepper, optional
2TbspsOlive oil for dough
6TbspsOlive oil for pans
1CupPizza sauce, homemade or canned
Pizza toppings
1 1/2CupsMozzarella cheese, about 8 oz.
Directions
  1. In a small pitcher or pyrex measuring cup, mix lukewarm water, yeast, powdered milk, and sugar. Let sit 5-10 minutes until yeast starts working; liquid gets frothy as bubbles begin to form.
  2. While waiting, put flour, salt, and cayenne pepper in KitchenAid mixing bowl.
  3. Add 2 tablespoons olive oil to yeast liquid. Using flat beater at low speed, mix yeast liquid into flour mixture until just moist. Cover with a towel, and wait 5 minutes.
  4. Switch to dough hook, and knead for about 5 minutes. The dough is ready when it is soft and elastic. If dough is too stiff, add water 1 teaspoon at a time. If dough is too sticky, add flour 1 tablespoon at a time.
  5. Divide dough into 3 pieces.
  6. For each pizza, put 2 tablespoons olive oil in a 9 inch cake pan. Knead a piece of dough by hand about 10 times. Using a rolling pin, roll dough into a circle. The circle should be slightly larger than the cake pan since the dough contracts when put in the pan.
  7. Cover pizzas with a kitchen towel, and let rise for 1 to 1 1/2 hours.
  8. Preheat oven to 475 degrees.
  9. Spread about 1/3 cup sauce on each pizza, and put on toppings.
  10. Bake pizzas 10 minutes with just sauce and toppings.
  11. Sprinkle about 1/2 cup cheese on each pizza, and bake 7-10 more minutes. Pizza is ready when cheese is melted and bottom is golden brown.

Saturday, January 4, 2014

Veggie Cream Cheese Spread

I made this spread the other night when my husband's business partner and his family came for dinner. I experimented with cream cheese spreads when my husband's uncle visited from India. He is a vegetarian and asked me for some sandwiches for his plane trip. I like the vegetable cream cheese served at Bruegger's Bagels and Atlanta Bread Company and came up my own spicy version.

Other Cream Cheese Spreads

When I was growing up, we often had crackers served with a block of cream cheese topped with Pickapeppa sauce or topped with pepper jelly at parties. I still serve both of these easy, inexpensive appetizers.

Veggie Cream Cheese Spread

I vary the vegetables used in my spread based on what I have at home. My spread usually has carrots since they give the dish a wonderful golden color and hot peppers since my family likes spicy food. I have also added celery, radishes, zucchini, dried tomatoes, and/or garlic into my versions. Thanks to my husband for taking the following photo.

Ingredients
1 8 ounce packageCream cheese, at room temperature
1/2 Jalapeño, finely chopped
1/2 CupGrated carrot, about 1 medium
1 TbspFinely chopped onion
1 TbspFinely chopped celery
1/2 TspSalt
Directions
  1. Place cream cheese in mixer, and mix until smooth.
  2. Add remaining ingredients, and mix well. Stop and scrape sides and mixing blade occasionally to get a uniform spread.
  3. Serve with crackers and/or vegetables.

Jalepeño Cilantro Cream Cheese Spread

This is a spicy version. Add one pepper, and try it before adding the second pepper.

Ingredients
1 8 ounce packageCream cheese, at room temperature
2 Jalapeño, finely chopped
1/4 CupFinely chopped cilantro
1/2 TspSalt
Directions
  1. Place cream cheese in mixer, and mix until smooth.
  2. Add remaining ingredients, and mix well. Stop and scrape sides and mixing blade occasionally to get a uniform spread.
  3. Serve with crackers and/or vegetables.